
Subscribe to our blog
More Posts
More Posts
Jun 18, 2025
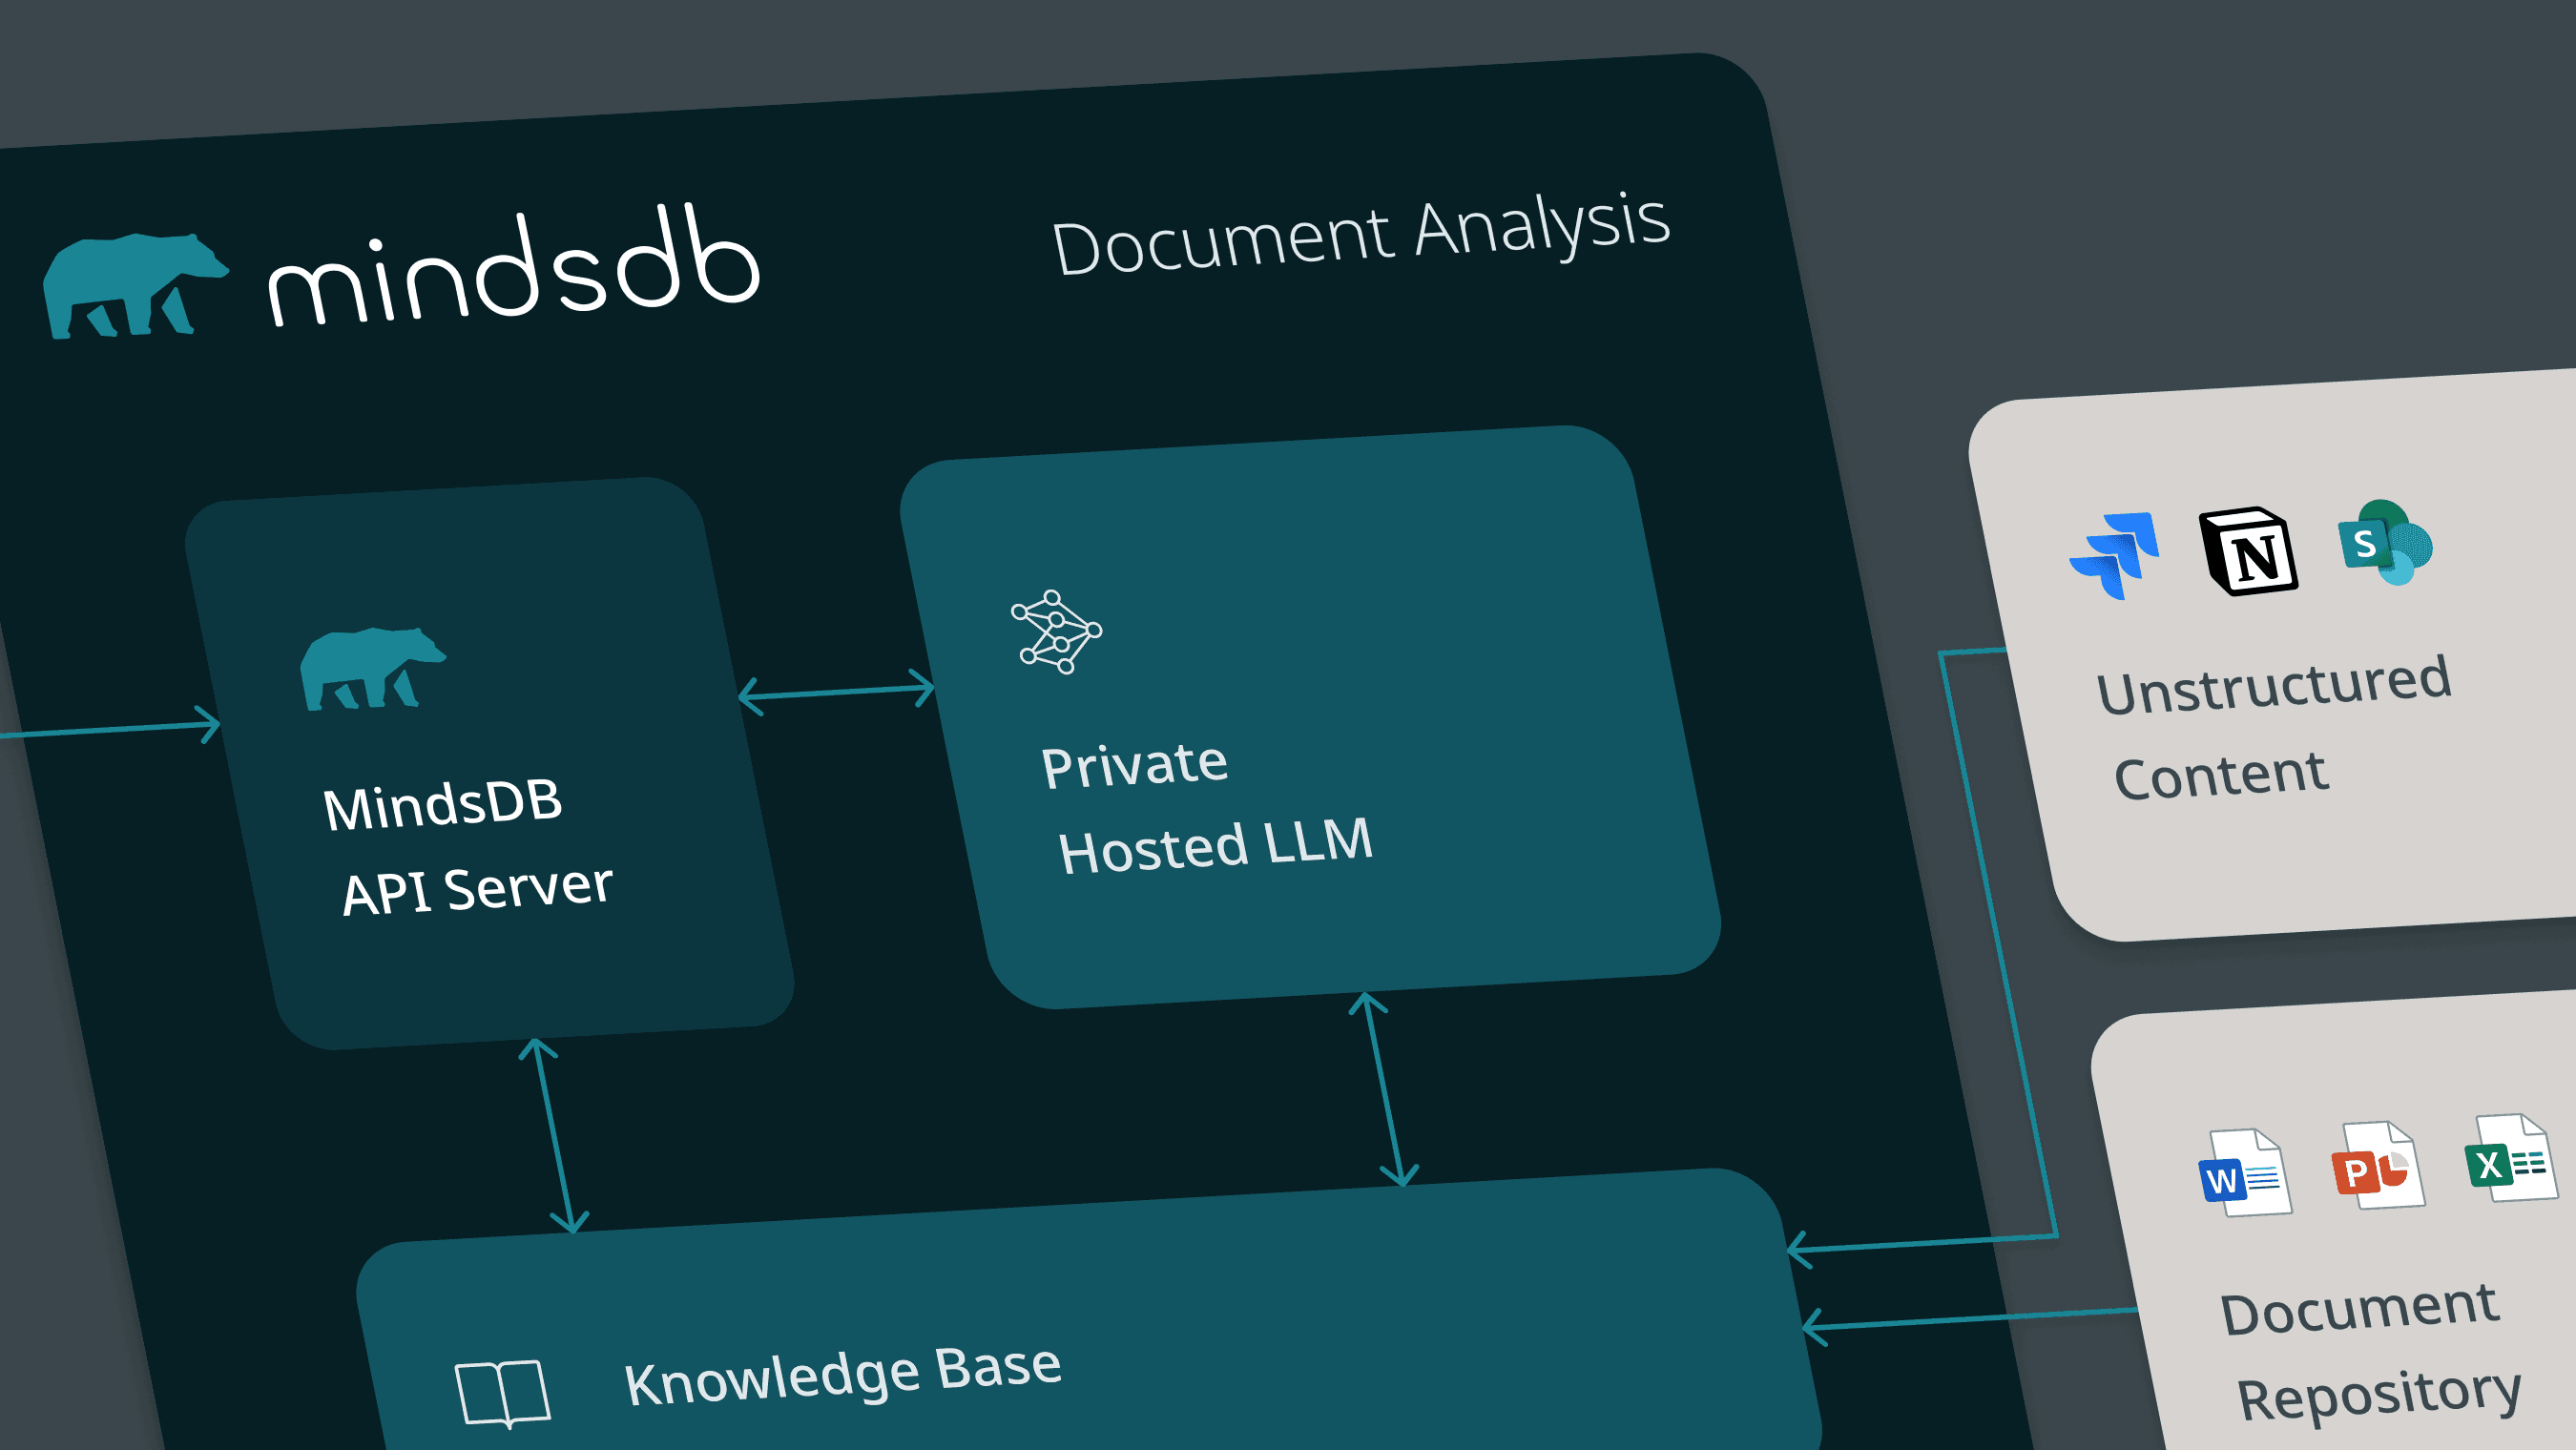
AI Document Analysis for Private Repositories: Get Insights across Millions of Documents
AI Document Analysis for Private Repositories: Get Insights across Millions of Documents
Jun 17, 2025
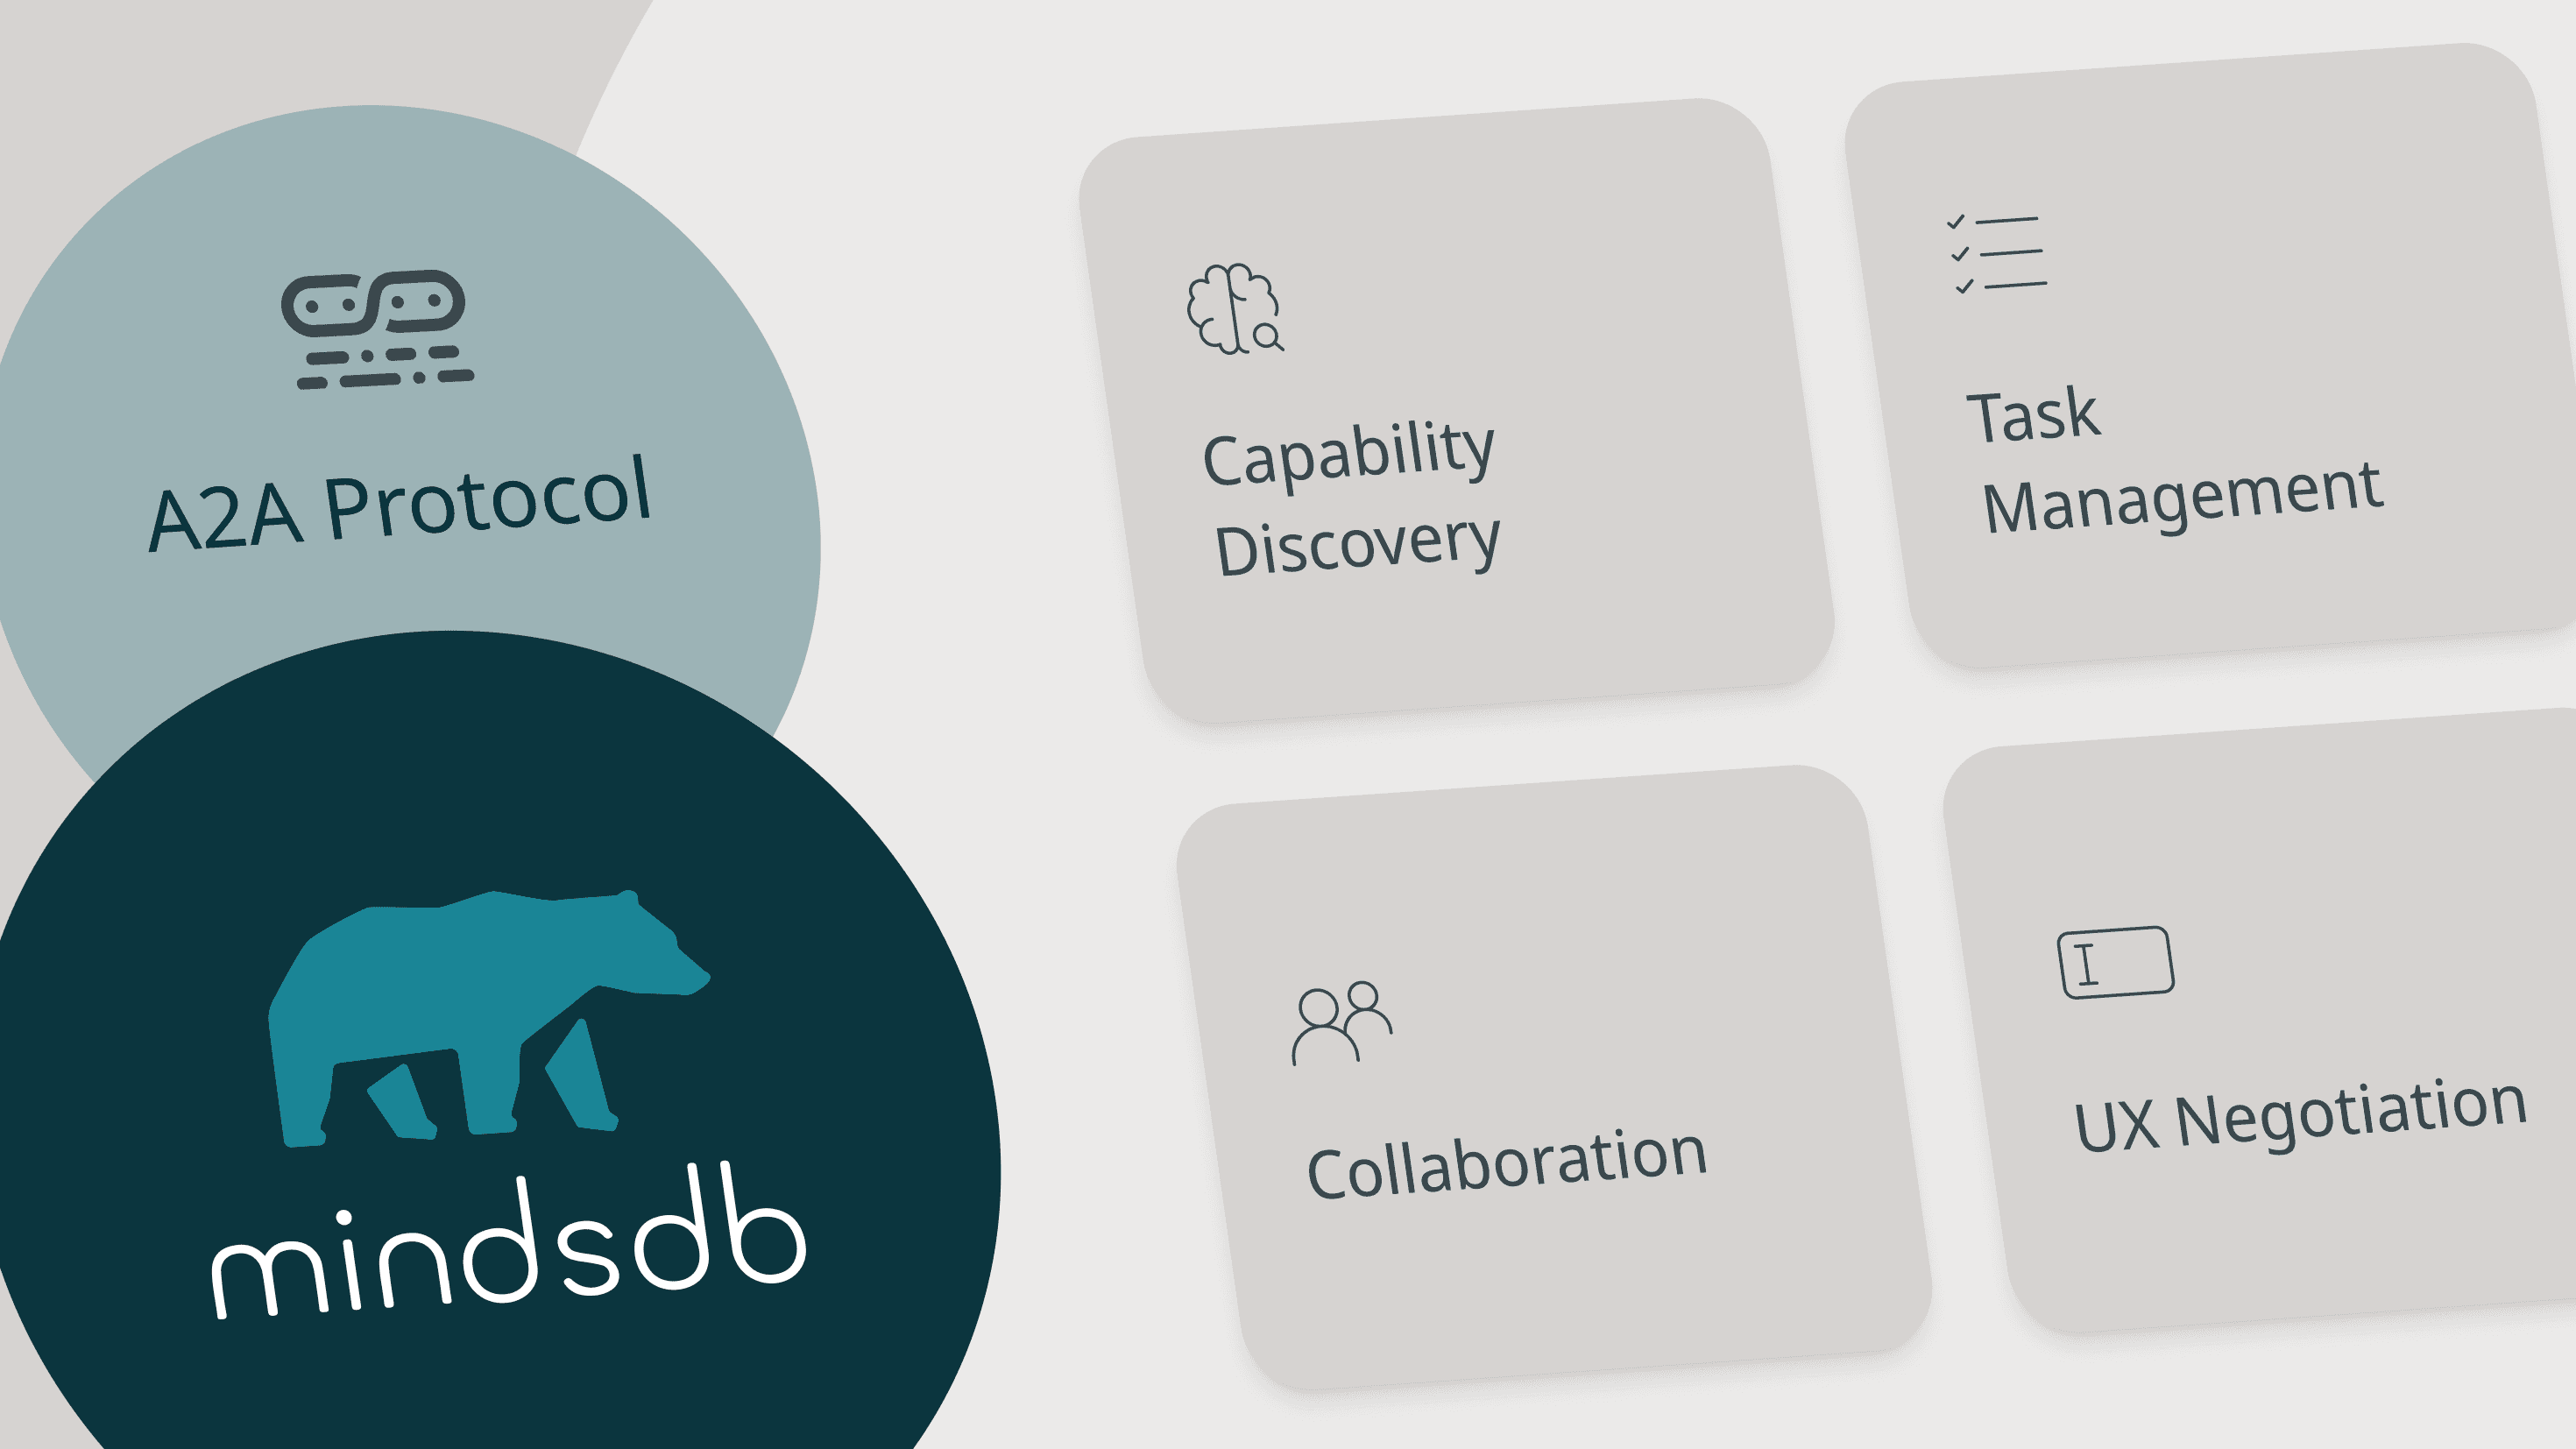
MindsDB now supports the Agent2Agent (A2A) protocol!
MindsDB now supports the Agent2Agent (A2A) protocol!
Jun 11, 2025
MindsDB Minor Release Notes v25.6.2.0
MindsDB Minor Release Notes v25.6.2.0
May 28, 2025
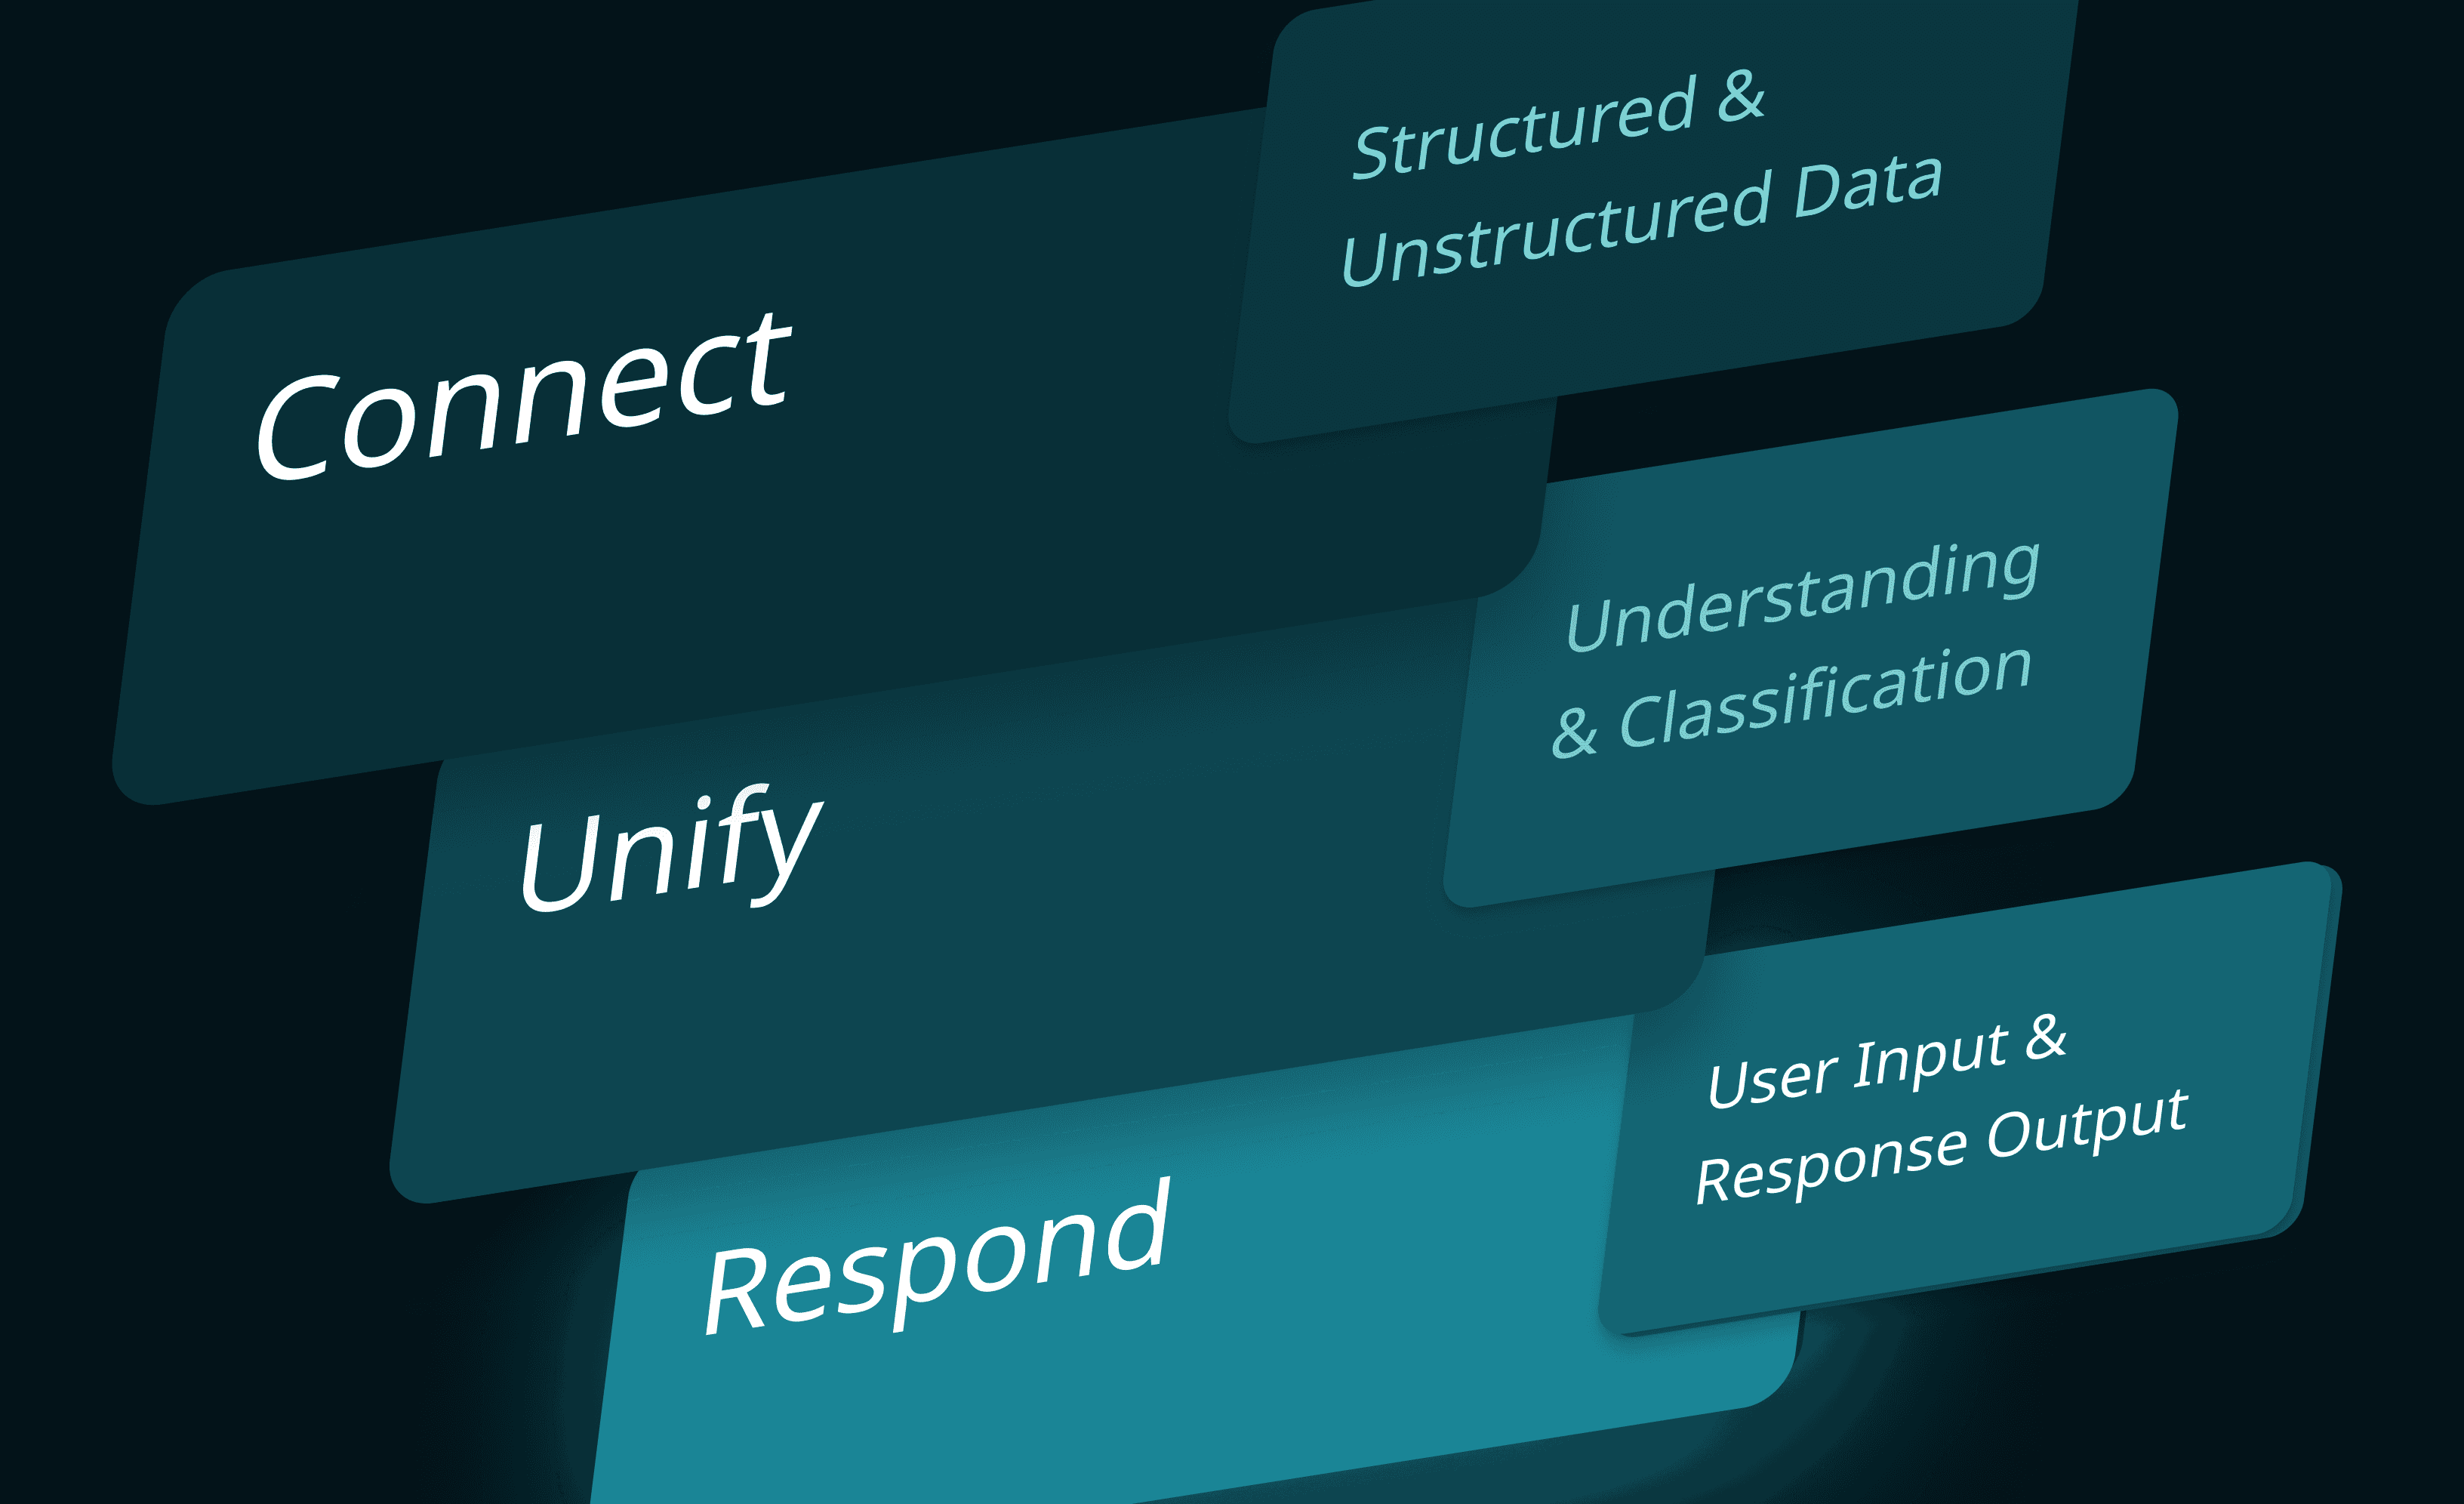
Your Data Has a New Interface: Introducing Chat-Powered Semantic & SQL Insights in MindsDB Open Source
Your Data Has a New Interface: Introducing Chat-Powered Semantic & SQL Insights in MindsDB Open Source
May 28, 2025
MindsDB Minor Release Notes v25.5.4.2
MindsDB Minor Release Notes v25.5.4.2
May 22, 2025
MindsDB Now Supports Google Gemini 2.5 Flash and Gemini 2.5 Pro
MindsDB Now Supports Google Gemini 2.5 Flash and Gemini 2.5 Pro

Start Building with MindsDB Today
Power your AI strategy with the leading AI data solution.
© 2025 All rights reserved by MindsDB.
Start Building with MindsDB Today
Power your AI strategy with the leading AI data solution.
© 2025 All rights reserved by MindsDB.
Start Building with MindsDB Today
Power your AI strategy with the leading AI data solution.
© 2025 All rights reserved by MindsDB.

Start Building with MindsDB Today
Power your AI strategy with the leading
AI data solution.
© 2025 All rights reserved by MindsDB.
Start Building with MindsDB Today
Power your AI strategy with the leading
AI data solution.
© 2025 All rights reserved by MindsDB.